Maximizing Your Battery Life (iPhone/iPad Edition)

Maximize your iPhone or iPad battery!Battery life is always a trade-off between functionality and battery lifespan – the more you use it, the quicker it dies.  However, there are lots of things your device does in the background that really aren’t vital to your happiness, so you can tweak things to help your battery last up to twice as long.  This post will focus on battery saving tips for iPhone and iPad – let’s get started:

1.      Screen Timeout / Brightness / Locking: The backlight on the screen is probably the biggest battery drain of any one component.  Do the following:

a.      Go into Settings… Brightness and turn down the screen brightness as low as you can stand it – I usually do 35-40% with Auto turned ON (saves a bit more juice).  Manually adjust when needed.

b.       Go into Settings… General and turn Auto-Lock down to the quickest you can stand.  1-minute is good.

c.      Use the lock button!  This key is in the upper right corner of the iPhone or iPad – it locks the screen and turns off the screen immediately.  Use this every time you’re done with the phone, and even during a call if you use a headset – screen off = good.  iPads will keep playing music while the screen is off.

2.      Turn off radios you’re not using.  The second biggest drain on an iDevice are the radio chips that interact with the world.  There are a few things here that really make a difference:

a.      Turn off BlueTooth when not in use.  If you aren’t going to pair your iDevice with something over Bluetooth, turn it off!  Even if it’s periodic, only turn it on when you’re using it.  Go into Settings… General… Bluetooth and turn it off when not in use.  Use a wired headset and you can avoid Bluetooth.

b.      Turn off 3G data if speed isn’t vital.  This is a big one: using 2G mode instead of 3G mode doubles your talk time.  Really.  Go into Settings… General… Network and turn “Enable 3G” OFF.  If you’re a light data user, you won’t notice much of a difference.  4G models of iDevices (like the New iPad) have a setting to disable 4G and just use 3G, but there’s not enough data out yet to justify this.

c.      Airplane Mode is your friend.  Don’t want to get calls/texts while you sleep?  Turn on Airplane Mode and it will shut down all radios – it’s at the top of Settings.  You can still use wi-fi in this mode, if you want.  If your device is Jailbroken, you can use “iPhoneTool” from Cydia to do this automatically at preset times.

d.      Wi-Fi is better than 3G.  This is counter-intuitive, but the wi-fi chip actually uses less power than the 3G chip.  Hook into wi-fi wherever you can, and 3G will switch to it automatically.  TIP: If you use Siri on an iPhone 4S, it will be faster on wi-fi.

e.      Turn off Wi-Fi when not in use.  Go into Settings, Wi-Fi and turn it OFF if you’re not going to be around a trusted wi-fi source for a while, or if you don’t need data for a while.  This keeps it from constantly searching for hotspots.

f.       Turn off Location Services when not in use.  If you don’t lose your phone (or yourself) much, you can turn off the GPS radio and save a bit of juice.  This is under Settings.

3.      Turn off or adjust Background Services. This is the silent killer, so it’s vital you change these settings.

Email Push / Fetch: Most of us are not important enough to need absolutely real-time message delivery.  If you are – congratulations!  But if you’re like the rest of us, periodic “fetching” is fine, as opposed to being constantly connected to online services, waiting for it to be “pushed” to you.  This uses the radio constantly, and thus your battery.  This applies to email, not texts.

Go into Settings… Mail, Contacts, Calendars… Fetch New Data.  Turn Push OFF, then set Fetch to the longest interval you can live with.  15 Minutes or 30 minutes means data will activate, fetch your stuff, then turn back off during those intervals.  If you only need email to be refreshed when you open Mail, then set this to Manually.

Then go into Advanced from there and set every service to Fetch.  This is my recommended setting for everything in iOS 5, because it allows background syncing.

4.      What about charging?  Your built-in lithium-ion battery will last longer if you charge it properly.  Tips from LifeHacker (where the picture above comes from) on this can be found here, but the short answer is: Don’t let it discharge to 0% every time, don’t keep it plugged in and charging past 100% for long periods (days), and keep it cool.

What if America Wasn’t “Addicted To Oil?” Would We Be Safer?

Let me first say that the presentation I’m about to show you is by a man I admire quite a bit – he has a passion for efficiency that makes me look like an amateur.  Check out this great presentation (and admire the style of the slides as well), then let’s discuss it for a minute…

Now, what would happen if we actually DID THIS?  What if America moved totally to an oil-free economy by 2050?  While I agree we need to strive for this goal, I started to think of the actual results on the rest of the world.  See if this makes sense:

  • The world price of oil would collapse to $20/barrel or less

Think of what would happen if the largest consumer of oil in the world stopped importing any oil?  The price of oil would not go to $0, since China and India still would need it in the short term.  But do you think OPEC would let America just STOP?  Of course not.

The price of oil would be drastically reduced, and a fair number of America’s population would desperately hold on to their oil-based machines since it would be so much cheaper to operate them (pollution be damned).  The only way we would totally stop using oil is if there weren’t any left.  But this would result in other effects…

  • The economy of the Middle East would collapse, fueling more extremism

There are a number of countries in the Middle East, Africa, and South America that depend on oil sales as their number one source of revenue – so what would happen if oil reduced in value by 80%?  Absolute economic chaos, that’s what would happen.

Many countries have grown so accustomed to oil revenue that they haven’t developed any secondary industries to supplant it (Libya and Iraq could be classified this way.)  Saudi Arabia has created so many obligations that they NEED the price of oil to stay high – if it didn’t, their governments would be toppled quickly.  So extremists would rise out of economic desperation to confront us once again.

  • The US would not maintain a strategic advantage using these technologies

Think of the companies that have or will develop clean technology – I would assume that most of them are publicly traded.  So if the US developed a revolutionary way to run our entire economy without oil, do you think the Federal Government would prevent those companies from selling these products abroad?  Would they be kept for Americans?

Probably not – in order to please Wall Street, these companies would have to open their markets internationally, and sell these technologies to our economic competitors (unless those nations just decided to take advantage of cheap oil, which they probably would).

My point is this: getting off oil is a dream for many (including myself), but it would not result in an economic revolution.  It might be a way to keep manufacturing in the US for a while, and it will definitely reduce our carbon footprint – but as long as oil exists and is cheap, other countries will continue to burn oil and our long-term problems will remain.  It would take an international mandate to abolish oil to affect real change – and that will not happen in this century, I’m afraid.  I think we should still develop a clean economy, of course, but the true impetus of change will have to be something other than money.

Why DropBox Is So Cool

Remember “SneakerNet?”  Where you would literally walk from computer to computer, carrying a floppy disk, Zip Drive, or some other outdated thing with your files on it?  I can’t say that those things have totally gone away (USB thumb drives have replaced floppies, but people still carry them around).  I can say, however – there’s a better way.

DropBox was started recently by a devoted team of coders, and they were one of the first services to offer universal cloud-based storage.  What does this mean?

It means that they run a data center with lots of hard drives, and when you sign up, you get a small slice of that storage.  Then you can copy files to that space and have those files available to you anywhere you have an internet connection.  What’s “magic” about it is that whenever you update a file in your DropBox, every other device you have connected to it updates the file immediately.  Plus, you can access your stuff from any Android phone, iPhone, PC, Mac, or anything with a web browser.

What’s more, it has a rich developer community that has written amazing addons to DropBox (a complete catalog is here).  You can share a specific folder with others, or have a public folder with download links to any file.  You can email files to an email adddress which will add the email’s attachments to your DropBox.  It even supports syncing of photos and video like Apple’s iCloud.  There are whole websites that automate the processing of files that appear in DropBox folders (read about one example, Wappwolf, here).

I recommend it to small companies who need a shared “file server” but don’t want to set up hardware for it.  Give it a try by clicking here, it’s free!

Create & Deliver A Great Presentation

Everyone has to sell themselves at one time or another – selling your idea, the company or product you represent, or even you as a prospective employee.  Along those lines, most of us in the business world have to deliver a presentation at some time during our careers, and this activity strikes some people with sheer terror.  But fear not!  It doesn’t have to be that way.  There have been volumes published on this topic, but let me distill it down to a few key tips so that your presentation is effective and memorable.

Start With An Outline

I cannot stress this enough – in order to convey a message to an audience, start with the message itself.  Most people remember only a few concepts from a presentation, and they remember it better if small points lead into big conclusions.  You cannot expect to leave the audience with a cohesive set of ideas if you do not organize them into a “flow” that makes sense.  So make an outline of your content FIRST.  Here’s an example:

  • Agenda (usually this outline)
  • Introduction to the problem
  • Why this affects YOU, the audience
  • How does this affect you (what is, and how big is, the “pain point”?)
  • Propose a solution
  • Explain why the solution works
  • Summary and Next Steps (give your audience a “call to action”)

The above example tells a story about a problem, then suggests a way to fix it, then asks them to act in some way to make it a reality (buy my product, adopt a strategy, etc.)  People will remember it better because it flows from one logical point to another like a story does.

Plus, notice how I structured the content.  You tell them the story three times:

  • Tell them what you’re about to tell them (Agenda)
  • Then  tell them the story (Content slides)
  • Then tell them what you just told them (Summary & Next Steps)

If you repeat your message in this way, retention (and action) goes WAY up.

Less Is More – A Lot More

When creating slides, some people list out numerous bullet points on a single slide, then stand there and read them all to the audience.  Do not EVER do this.  Some slides merit a few bullet points, but keep the text on the page very, very minimal.  Otherwise, the audience is squinting at the slide, trying to take in all the text – and they won’t be listening to you while they do it.  Keep each slide to a few words, and they will read the slide, get the idea, then turn their attention right back to you and listen to the detail.

Spreading out your key points into several slides, and moving through them quickly, will also make the presentation more engaging – maximizing audience interest.  Also, use Google Images to find the highest resolution pictures you can to convey your idea.  Don’t use Clip Art unless you a) absolutely have to, or b) want to bore your audience.

Also, a note about animation: keep it subtle.  Don’t have ANYTHING flying around your slides.  It adds nothing to the meaningfulness of your message – only a distraction.  If you want to hide a portion of your slide/content, then fade it in with a mouse click when you get to that point, go ahead – that’s a good way to increase audience focus.

Practice, Practice, Practice!

Put your completed (and saved) presentation into Slide Show Mode and pretend you’re giving the actual presentation to an audience.  Rehearse what you want to say in each slide, and go through the entire thing – make a note of your time spent.  Adjust your content or your delivery to fit within the time allotted for you.  Do this 2-3 times!

When you have to do the presentation, keep a second copy of your file on a USB thumb drive (or online).  You don’t want some disaster to wipe out the only copy.  Also, make sure your projector is connected correctly and focused beforehand, or if using an HDTV, make sure it’s set up correctly.  If using a TV, I would recommend you change the size of your slides to a 16:9 ratio.  You may want to point the laptop screen at you (so you can see the slides while looking into the audience), and use a remote mouse clicker if you have one – they really help!

Delivery of the Message

All of this preparation and creation of great content is all well and good, but what if you don’t like to speak in public?  Public speaking was recently ranked as the thing Americans feared most.  More than drowning!

Remember when you were a kid, and you asked your parents for something you really wanted?  You learned very quickly how to phrase things to get them to react.  This is no different, except no whining this time.  You want to speak to the audience as if you’re only speaking to one person, and you’re asking them for a favor, or telling them a joke, or justifying your attitude about something (video tips on public speaking here).  A passionless delivery will get you nowhere.  What I’m saying is: make it personal to them, because when they are listening, THEY make it personal to them.

That’s it!  More tips can be found here: http://presentationzen.com – plus, the video below contains some hilarious PowerPoint tips from comedian Don McMillan:

Maintaining Your Online Brand – the 21st Century Imperative

Most folks in the Internet business understand the importance of creating an online brand, but is it just as important for individuals as it is for businesses? Absolutely.

An “online brand” is the way other people (and businesses) see you on the internet.  This can be as simple as a Google search for your name, which most of us have done at one time or another.  Here’s a useful exercise: do one for yourself now, and make a note of what you see on the first page of search results.  Go ahead, I’ll wait.

Are they relevant, positive links to you and your identity, or are they:

a) links to another person with the same name, or worse,
b) links to negative items you’d rather people not see?

Positive examples can include profiles of you on sites that you can control (Facebook, Picasa Web Albums, Twitter, LinkedIn, etc.), while negative items can be web pages with your name on it that don’t put you in a good light.

Make no mistake: people can and will search for you – a new girlfriend, a prospective employer, or even family members.  There are a huge number of websites out there that specialize in collecting information on you and selling that package to whomever wants to buy it.  This is similar to companies that sell your browsing behavior to marketing firms, but it goes WAY beyond that – most of the time, you will not be personally identified in packages of browsing data (you will be part of a large statistical sample).  With sites like WhitePages.com, Intelius.com, pipl.com, 123people.com, and many others, it’s all about finding YOU, you personally.

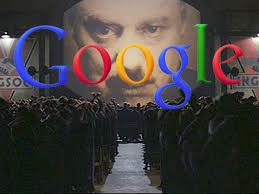
Remember Big Brother in 1984? It's kinda like that.

There’s generally one rule to the internet – once it’s out there, it doesn’t go away.  This rule isn’t great for anyone who has embarrassing content posted about them – think about any celebrity scandal involving pictures or video.  But there are ways of bending these rules in your favor, and it has everything to do with flooding the internet with links to sites that are within your control to “bury” sites that have bad content, pushing those items to later pages of a search (where people are less likely to see it).  This is Search Engine Optimization for YOU, and this is what this article is all about.

First, a little background

Search engines like Google and others use a complicated method of determining what web pages are listed first for a particular search term.  This formula is called an algorithm, and the specifics are usually kept secret.  But there are general rules that everyone knows and follows to get on page 1 of search results.  Let’s say you have a website: FluffyBunnies.com, and you want people who search for “fluffy bunnies” to see your site on page 1.  The rules include:

  1. Web pages that list the exact search keywords (“fluffy bunnies”) in their meta tags are ranked higher
  2. These keywords need to exist in the title of the page as well as the content (and have those words appear more than once)
  3. If people search for “fluffy bunnies” then click on fluffybunnies.com, it moves up in the rankings
  4. If other web pages link back to fluffybunnies.com, that’s also good (especially if those other sites are popular)
  5. If you pay Google to list you as a “Sponsored Site” for those words, you’ll be listed (but we’d like to do it for free)

So what does this have to do with you?

Your online brand is made up of web pages displaying various things about you, so those pages need to be at the top of the search results (using your name as the search terms).  It helps to do the following:

Collect several sites that you use (or could use) to post content about yourself, then insert links to all the other sites in each site.  If you have a Facebook account, post a link to that page on your personal blog, and vice versa.  Here are some examples of popular sites that you can create free profile pages on, then cross-link all the others into each one:

Then make sure your name is listed in the body of each page, as many times as is reasonable.  Don’t write “Johnpamplin.com is John Pamplin’s website where John Pamplin talks about whatever John Pamplin thinks about, John Pamplin does, and everything else John Pamplin.  Oh did I mention John Pamplin?”  That’s stupid, don’t do it.

Note: there are sites out there that basically do this for you, and add in some basic monitoring of your brand.  Good examples are brandyourself.com, or safeshepherd.com, which walk you through the process of setting up cross links to your various online identities to boost your online brand.  It’s a pay site, but free for up to 3 links.  I’d say it’s worth the yearly $80 cost if your online brand is important to you, but if you’re short on cash, you can do most of it yourself.

Recipe: John’s Evil Mashed Potatoes

John's Evil Mashed Potatoes (not to scale)

Need some comfort food? This is about as good as it gets.

OK, I’ve been asked over and over how to do this, so one of my first additions to this site is a recipe I developed a few years ago and have been refining ever since.  It’s not complicated, it’s not difficult, it’s not expensive, and it’s NOT fat-free!  Don’t worry – it’s not that evil either.

John’s Evil Mashed Potatoes

Ingredients:

  • 5lb bag of whole red potatoes
  • 20-25 whole cloves of garlic, peeled
  • 1 brick of regular cream cheese (NOT reduced-fat or fat-free)
  • 2 sticks of butter
  • 1 medium Vidalia sweet onion, finely diced
  • 2 tbsp of dried parsley
  • Salt and pepper to taste (about 1 tbsp of each works well)
  • 1/2 cup of finely grated cheddar or Romano cheese

Slice the entire bag of potatoes, skin-on, into 1/2 inch slices and boil in a large pot of salted water with the cloves of garlic.  You can put in the garlic about 5 minutes after the potatoes to make them a bit stronger, if desired.  Boil until a sharp knife will easily move through the potatoes, about 15-20 minutes.

While the potatoes and garlic are boiling, skin and finely dice your onion and saute it over medium heat in a non-stick pan with some butter or olive oil.  You need to cook the onion until it turns translucent with some browning (about 4-5 minutes).  Take it off the heat and set it aside.

Drain the pot of potatoes/garlic through a fine strainer and place back into the pot.  Add the cream cheese, butter, onion, parsley, salt, and pepper into the pot and start mashing.  Mash to desired consistency, although chunky is my preference.  Try it as this point to see if you need more salt or pepper, then top it with the grated cheese.  Done!  Serves a whole lot of people.